If you're new to HomePod and don't regularly use the "Home" app for HomeKit devices, you might be wondering how you get to the HomePod's settings, because it's not immediately obvious.
HomePod is controlled entirely through Apple's Home app, much like any other HomeKit-compatible accessory. Accessing HomePod settings is simple once you know where to go, so here's how:
- Open the Home app.
- You'll see a main page that says "My Home" or "[Your Name]'s Home," with either a series of cards or just the HomePod card if it's your only HomeKit device.
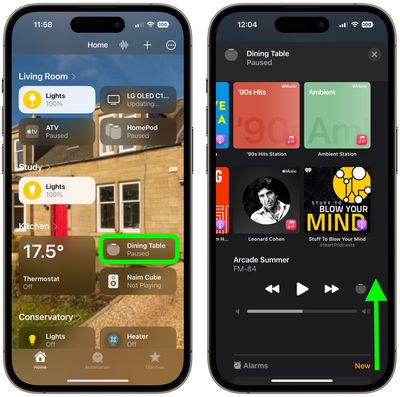
- Tap the HomePod card.
- Scroll down past the media playback controls, alarms, and timers to see the available HomePod settings. You can also tap the cog icon below the timers section.
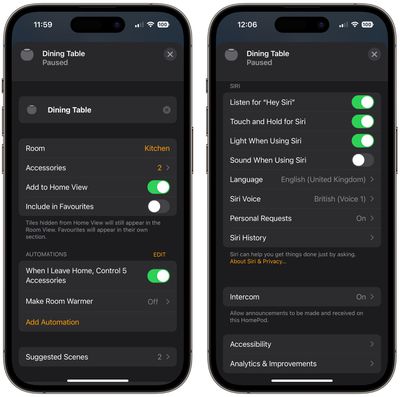
When you're done looking at the settings of your HomePod, you can get back to the main Home screen by tapping the X in the top-right corner of the screen.
Available HomePod Settings
In a HomePod's settings, you can change the name of your HomePod (tap where it says HomePod), change the room it is assigned to, add it to your Home favorites, manage automations, change your Siri settings, activate Accessibility features, turn off your Listening history, and more.
Secondary HomePod Settings
Confusingly, there are actually two separate settings sections for the HomePod in the Home app, so if you want to get to options like accessing software updates, you need to go to another section of the app. This split will actually make more sense when there are more AirPlay 2 speakers on the market, which will also be controlled through the Home app, and it also makes sense if you have multiple HomePod speakers. Here's how to get to the other settings:
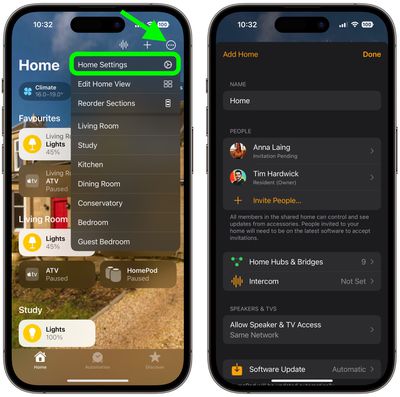
- On the main page of the Home app, tap the ellipsis button (three encircled dots) in the top-right corner.
- Tap Home Settings in the dropdown menu.
- Choose your home by tapping on it if you have more than one.
In this section of the app, you can see your list of home hubs, which includes the HomePod, and access the Software Update feature for downloading new software to the HomePod.
Even more settings are available if you tap on your HomeKit profile, which should be under your name. This is the area where you need to go to be able to turn off personal requests if you don't want HomePod to be able to do things like read your messages, create notes, and more.


Top Rated Comments
It makes all songs have the same average volume (a.k.a. Normalization). It has been a feature in iTunes and iPods for decades.
It does not reduce dynamic volume like “reduce loud sounds” on Apple TV